- Home
- Download
- Buy
- Features
- How it works
- FAQ
- Contact
- Media coverage
- For Android
- For Linux
- For macOS
- Tutorials
- How to recover photos from a memory card
- How to recover photos from a USB drive
- Recovering data from SSD drives
- How to recover documents from a USB drive
- How to recover deleted files from a hard drive
- How to recover files deleted from the Recycle Bin
- Create ISO images
- Custom heuristics guide
- Custom heuristics catalog
How to recover photos from a memory card
This short tutorial will show you how to use DiskDigger to recover accidentally deleted photos from a memory card. This can be an SD card from your camera, a microSD card from your phone or tablet, or most other types of removable cards found in today's devices.
Whether you deleted some photos from your card by mistake, or accidentally reformatted the card entirely, DiskDigger can usually recover most, if not all, photos that you lost.
Before you begin, make sure to remove the memory card from your device, and do not record any more photos onto it until the recovery process is complete. Any further changes you make to the memory card can decrease the chance of recovering the lost photos.
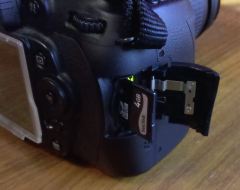
Remove the memory card and insert it into your computer's memory card slot. If your computer doesn't have a slot for the memory card, you can plug the card into a USB card reader, and plug the card reader into a USB port on your computer.
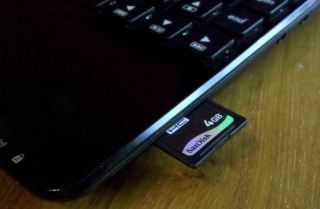
Some cameras or phones can be hooked up directly to your computer with a cable; however, this does not always make the contents of the card visible to DiskDigger. This is why it's recommended to take the memory card out and plug it directly into your computer.
Once the memory card is plugged in, you can launch DiskDigger, and you should see the card in the list of drives available for scanning. Select the card and click "Next."
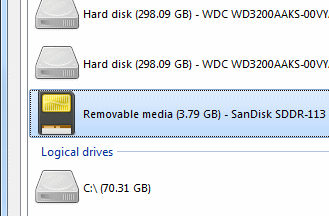
Note: If the memory card does not appear in the list of drives to scan, make sure it's inserted properly and click the "Refresh list" button. If the card still does not appear in the list, try plugging it into a different USB port. And if it still does not appear in the list, it may indicate that the card has a physical error and may no longer be recoverable.
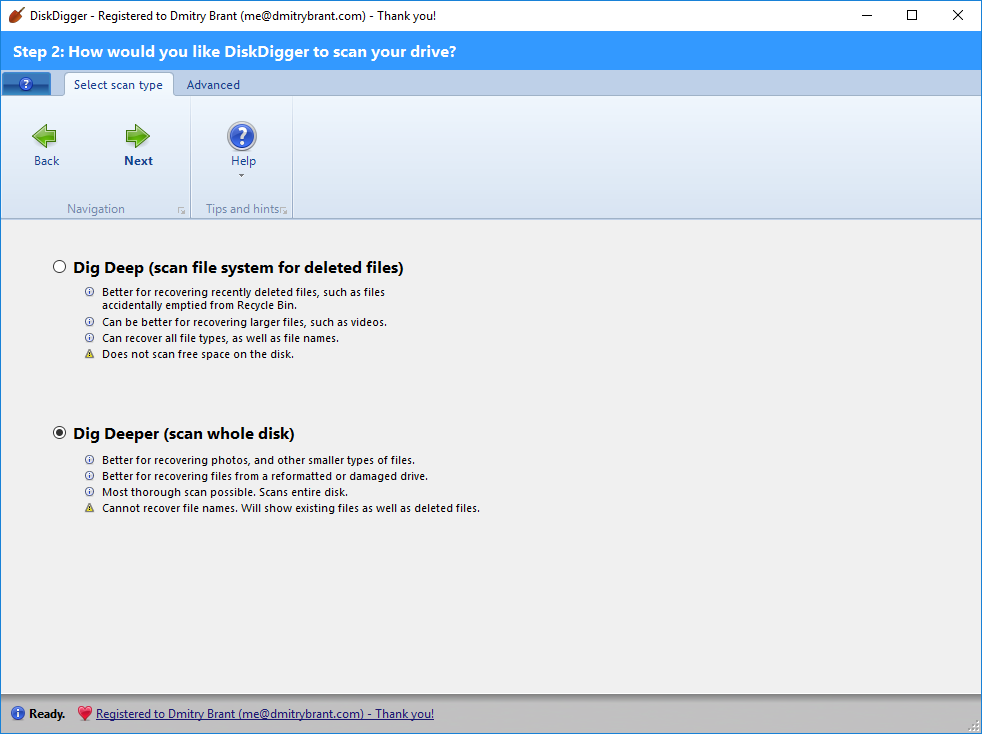
DiskDigger will let you choose between the "Dig Deep" and "Dig Deeper" modes. For the purpose of recovering photos, it's recommended to select Dig Deeper mode, since this is more likely to recover as many photos as possible.
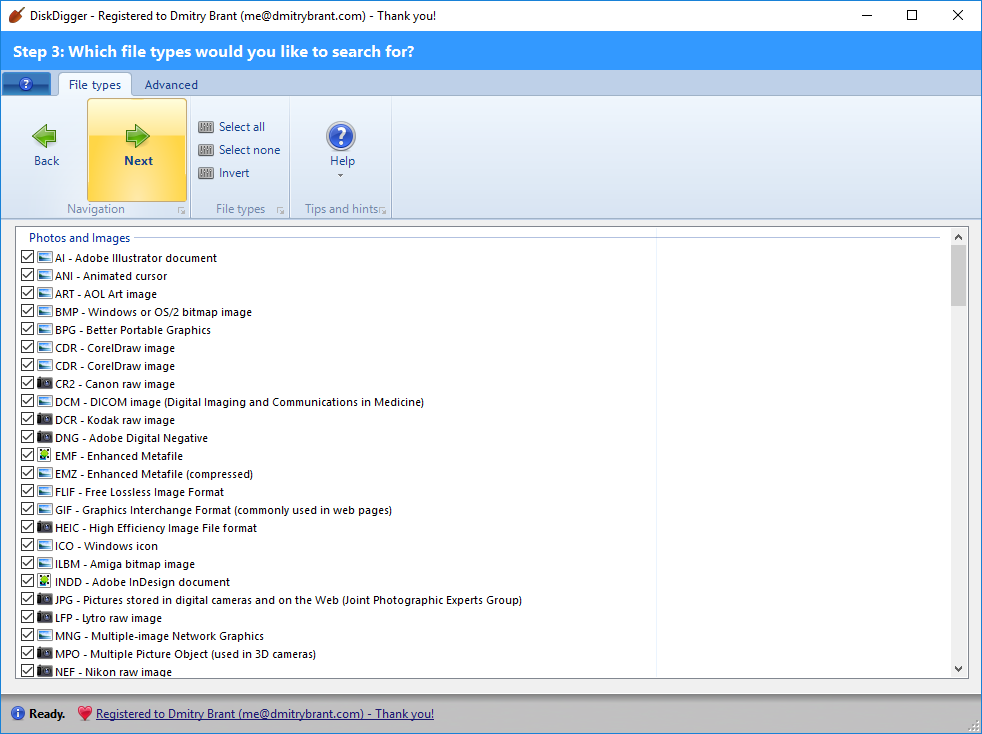
The program will now let you select the types of files you want to recover. By default, all file types are selected, including photos, so we'll just click "Next."
DiskDigger will now start scanning the memory card. As it starts finding photos, you'll see them showing up in the list on the left. By clicking on one of the photos it found, you can see a preview of the file on the right. Also, you can switch the list to show thumbnails, so you can see previews of each photo as it's found. You can do all of this while the program continues to scan the card.
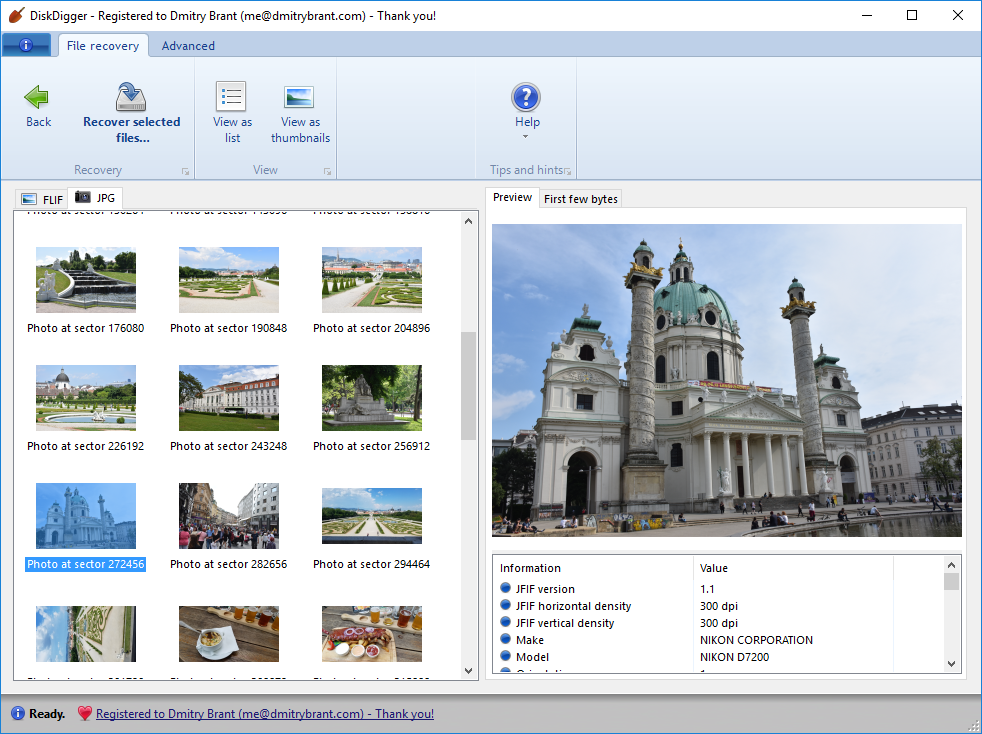
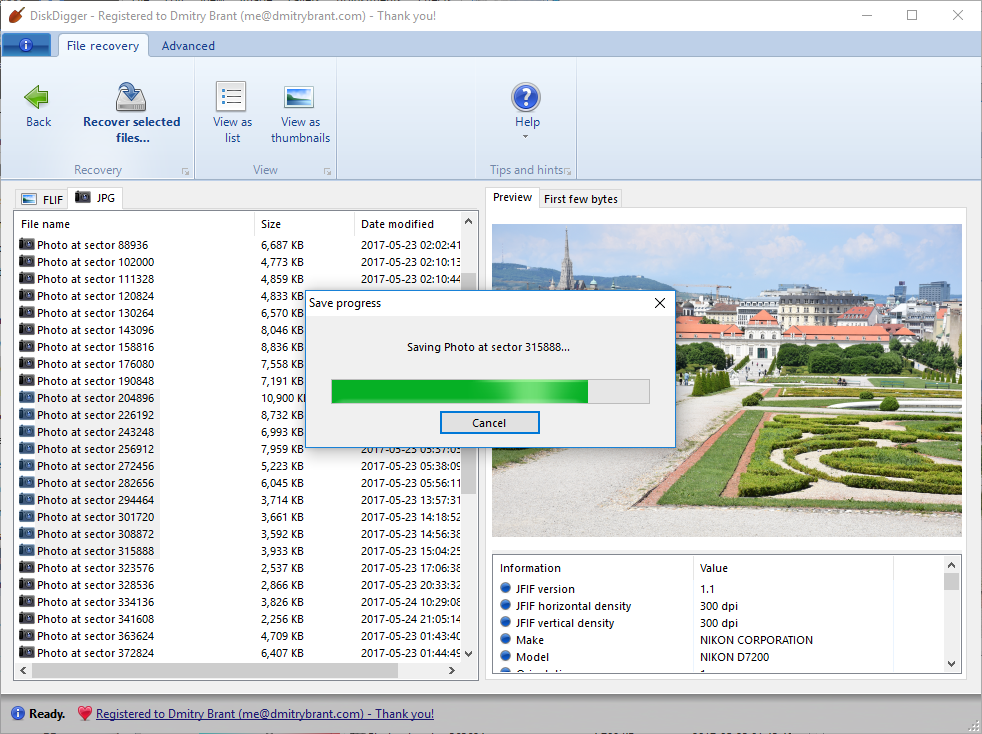
After a little while, the scan will be complete. At this point, you can select which photos you'd like to recover, and save them from the memory card to a different location.
You can select which files you'd like to recover in the same way you would select multiple files in Windows Explorer: you can click and drag a selection around the files you want to save; you can also hold down the Ctrl key and click on individual files to include them in the selection. If you just want to select all the files, you can right-click within the list, and choose "Select All."
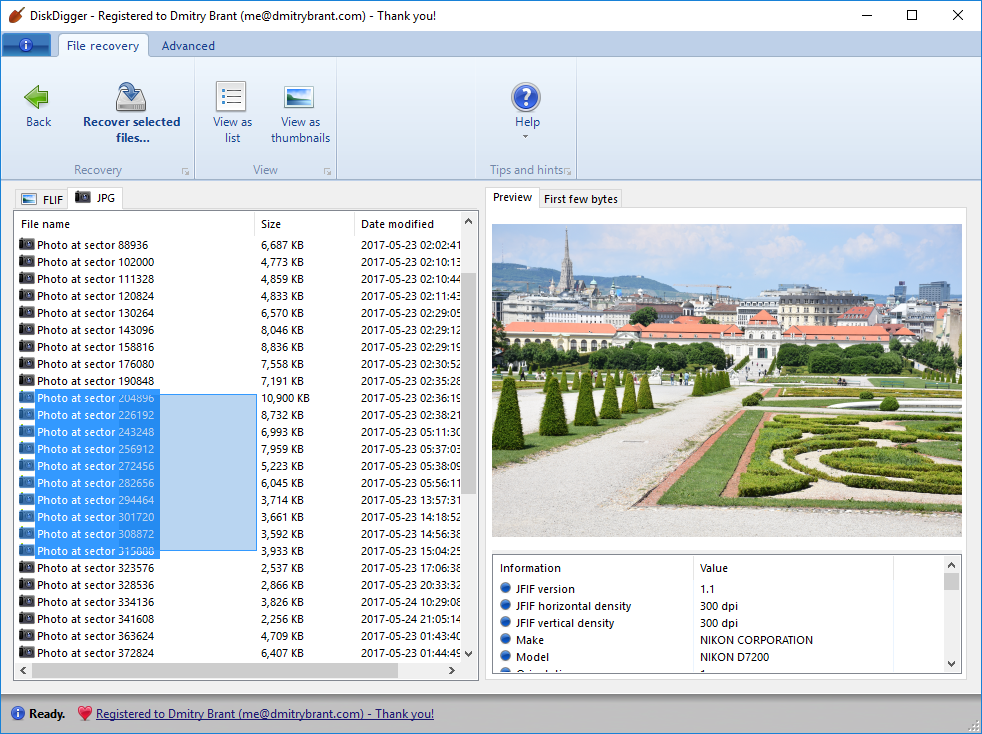
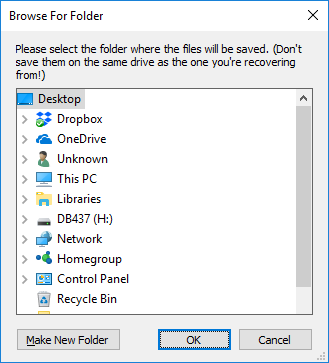
When the files are selected, click the "Recover Selected Files" button at the top. This will let you select the new location where the recovered files will be saved. In this example, I'll simply select the top-most "Desktop" folder on my computer.
Note: Do not save the recoverable files to the same drive as the one you're recovering from!
DiskDigger will proceed to save the files from the memory card to the new location:
When it finishes saving, it will automatically open the folder into which the files were saved. This folder will be called "Recovered," and will be inside the folder that you selected for saving the files. At this point, you can close DiskDigger since the recovery is complete!