- Home
- Download
- Buy
- Features
- How it works
- FAQ
- Contact
- Media coverage
- For Android
- For Linux
- For macOS
- Tutorials
- How to recover photos from a memory card
- How to recover photos from a USB drive
- Recovering data from SSD drives
- How to recover documents from a USB drive
- How to recover deleted files from a hard drive
- How to recover files deleted from the Recycle Bin
- Create ISO images
- Custom heuristics guide
- Custom heuristics catalog
How to recover documents from a USB drive
This short tutorial will show you how to use DiskDigger to recover deleted documents from a USB drive. Whether you deleted one or more documents from the drive by mistake, or accidentally reformatted the drive entirely, DiskDigger can usually recover most, if not all, of your documents.
First, plug the USB drive into a USB port on your computer. Once the drive is plugged in, you can launch DiskDigger, and you should see it in the list of drives available for scanning. Select the drive and click "Next."
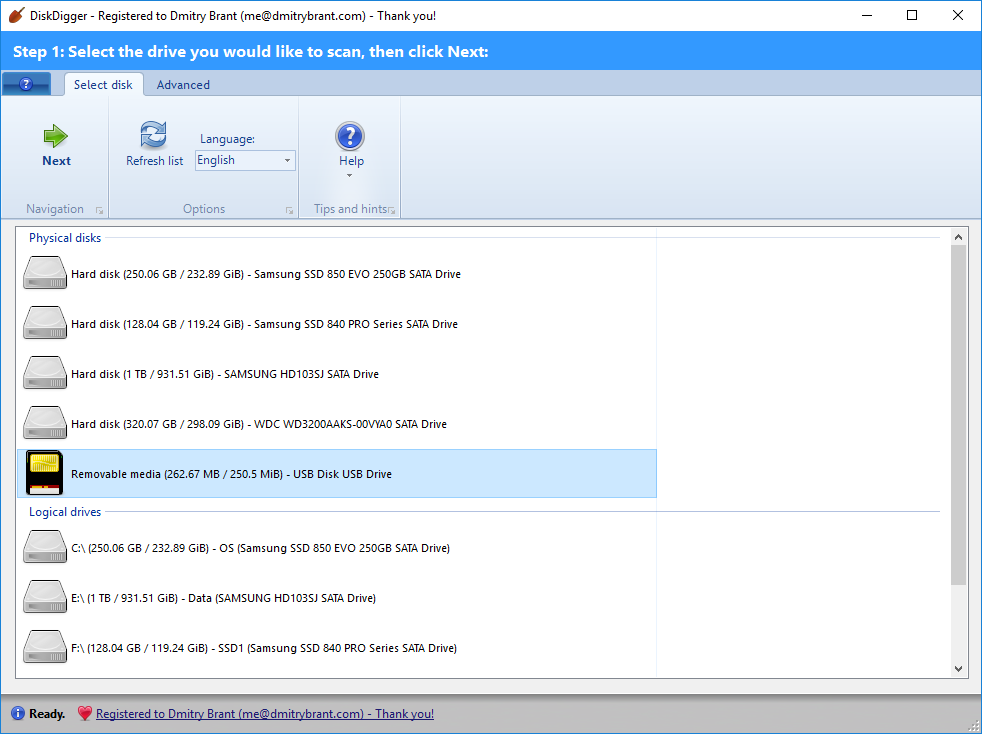
Note: If the USB drive does not appear in the list of drives to scan, make sure it's inserted properly and click the "Refresh list" button. If the drive still does not appear in the list, try plugging it into a different USB port. And if it still does not appear in the list, it may indicate that the drive has a physical error and may no longer be recoverable.
DiskDigger will let you choose between the "Dig Deep" and "Dig Deeper" modes. If your documents were deleted fairly recently (or if no other data was written to the drive after they were deleted), then Dig Deep should have a good success rate, and should be tried first. We can always go back and rescan with Dig Deeper if Dig Deep is unsuccessful.
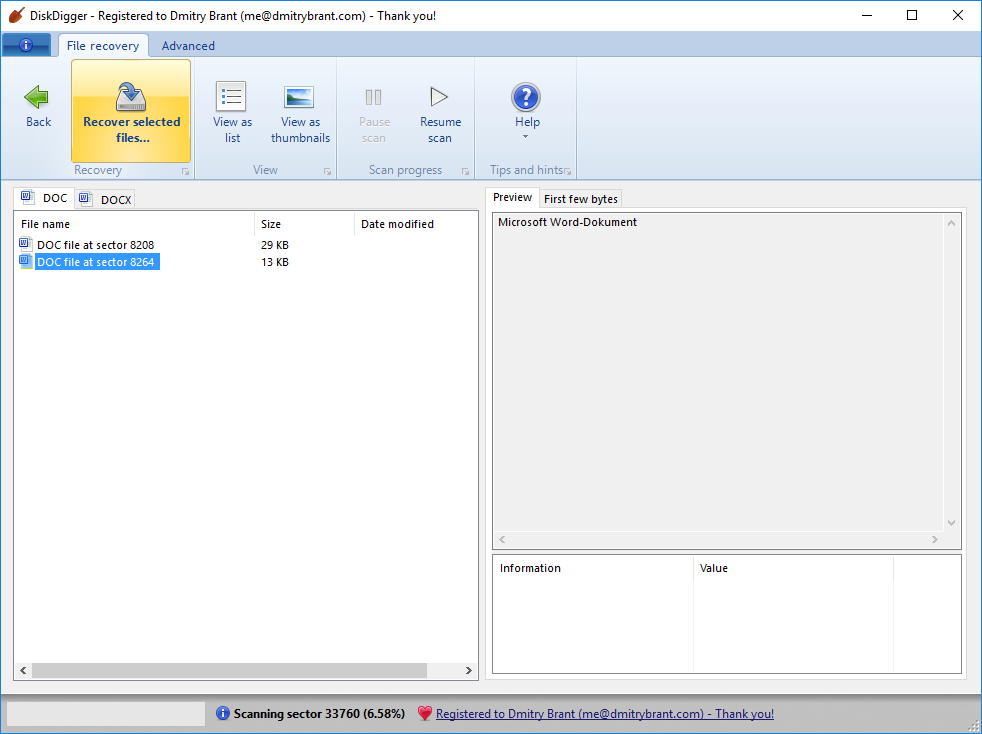
After selecting Dig Deep and clicking Next, DiskDigger will scan your drive. When it finishes, you should see a list of recoverable files:
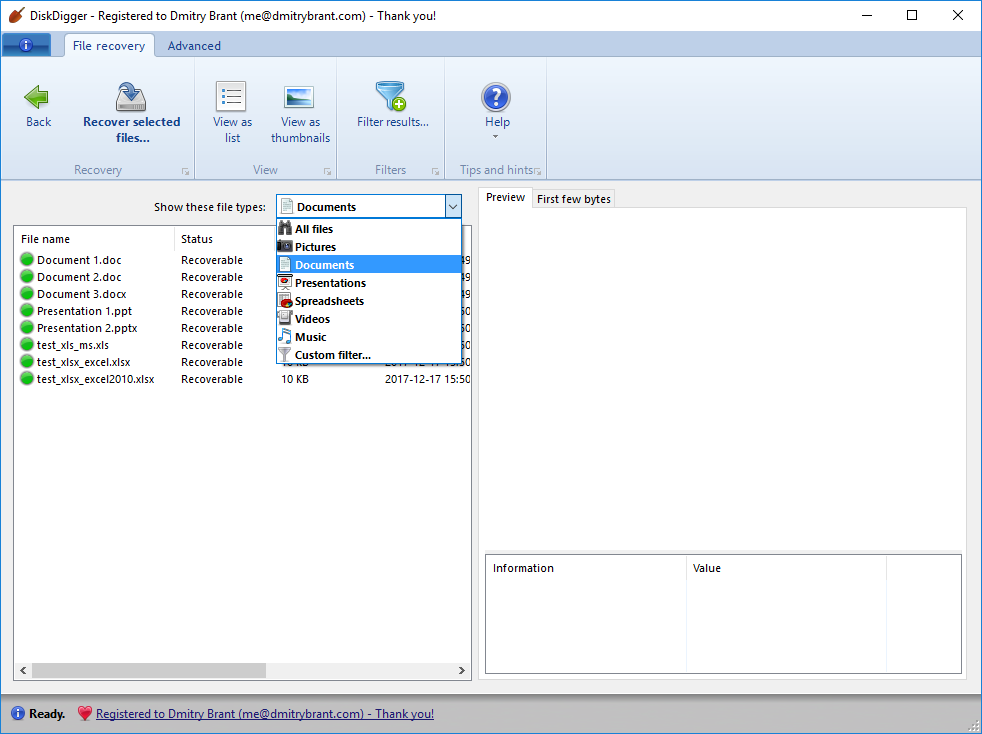
There are a few things you can do to narrow down the results that are shown:
- Click the drop-down box next to "Show these file types" and select the types of files you'd like to see.
- Sort the files by last-modified date by clicking the "Date modified" column header. This will bring the most-recently modified files to the top of the list. You can also try the "Date created" column.
Also take note of the "Status" column next to each file in the list: it tells whether each file is recoverable, overwritten or unknown.
- If the status is "recoverable," then the file is likely intact and can be recovered successfully.
- If the status is "overwritten," then the file is probably no longer recoverable using this method. Its contents have been overwritten by new data, or the filesystem indices that were pointing to this file have been reallocated. You may try going back and rescanning the drive with Dig Deeper mode.
- If the status is "unknown," it means that DiskDigger is unable to verify whether this file is fully intact. You may need to recover the file and open it manually to see if its contents are correct.
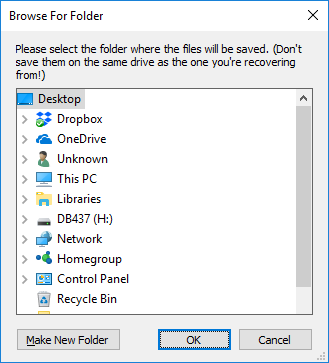
If you see the files you'd like to recover in the list, then select them and click the "Recover selected files" button. DiskDigger will let you select the folder into which the recoverable files will be saved.
At this point, if your files have been saved, then the recovery is complete, and you can now close DiskDigger.
However, if you do not see the files you're looking for, you may go back by clicking the Back button until you reach the selection of Deep and Deeper mode, and proceed with selecting Dig Deeper and clicking Next.
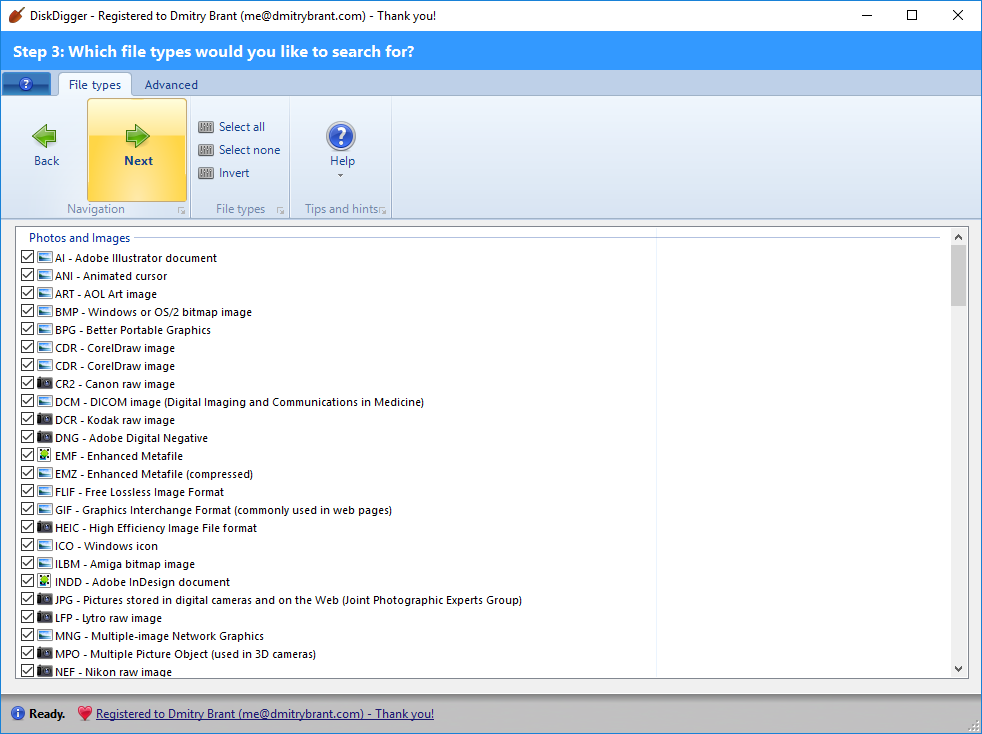
The program will now let you select the types of files you want to recover. By default, all file types are selected, but you may select only the specific types of files you'd like to search for. (It's OK to leave all the file types selected. When DiskDigger shows us the list of recoverable files, they will be grouped by file type.)
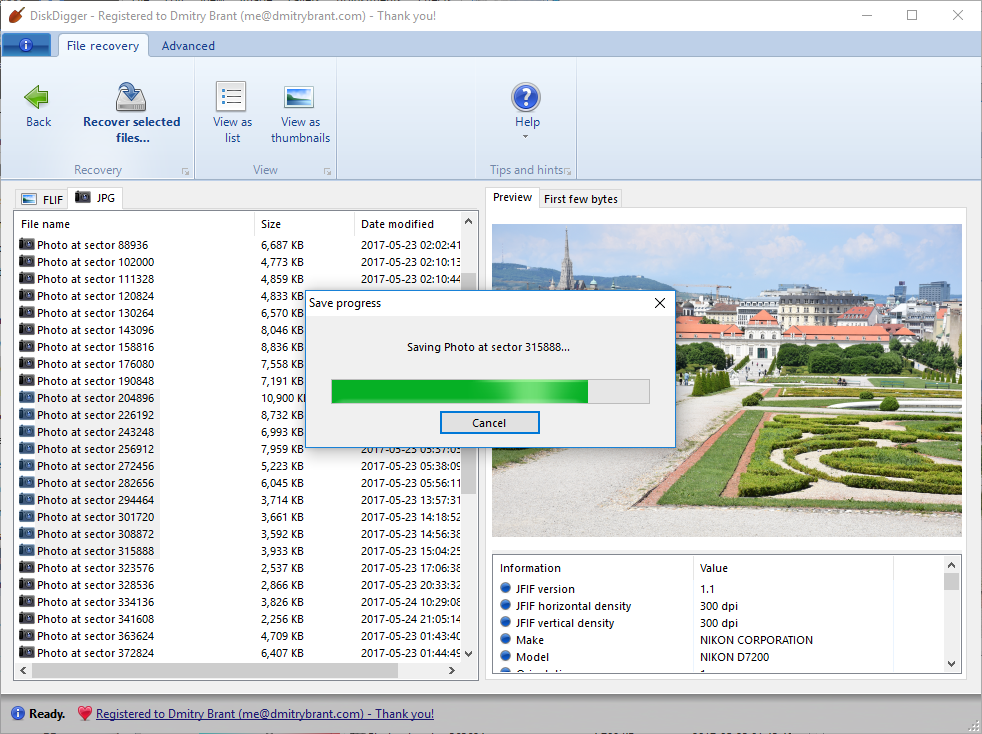
DiskDigger will now start scanning the USB drive. As it starts finding files, you'll see them showing up in the list on the left. After a while, the scan will be complete. At this point, you can select which files you'd like to recover, and save them from the USB drive to a different location.
You can select which files you'd like to recover in the same way you would select multiple files in Windows Explorer: you can click and drag a selection around the files you want to save; you can also hold down the Ctrl key and click on individual files to include them in the selection. If you just want to select all the files, you can right-click within the list, and choose "Select All."
When the files are selected, click the "Recover Selected Files" button at the top. This will let you select the new location where the recovered files will be saved. In this example, I'll simply select the top-most "Desktop" folder on my computer.
Note: Do not save the recoverable files to the same drive as the one you're recovering from! This risks overwriting some of the very files you're about to recover.
DiskDigger will proceed to save the files from the USB drive to the new location:
When it finishes saving, it will automatically open the folder into which the files were saved. This folder will be called "Recovered," and will be inside the folder that you selected for saving the files. At this point, you can close DiskDigger since the recovery is complete!